You’re running the latest AAA title on high settings, but your frame rate is stuck at 85 FPS when your monitor can do 144. You’ve already maxed out your in-game settings, and you’re wondering if there’s more you can squeeze out of your hardware. This is where GPU overclocking comes in, a proven technique that lets you push your graphics card beyond its factory specifications to gain a meaningful performance edge. Whether you’re chasing higher frame rates in competitive multiplayer or boosting visual quality in single-player games, learning how to overclock a GPU is one of the most cost-effective upgrades a gamer can make. This guide breaks down everything you need to know about GPU overclocking, from the fundamentals of how to overclock your GPU safely to advanced optimization techniques, so you can unlock the full potential of your graphics hardware without risking damage.
Key Takeaways
- GPU overclocking increases graphics card performance by 8–15% through gradual clock speed adjustments, delivering noticeable frame rate improvements without costly hardware upgrades.
- Invest in quality cooling solutions and use industry-standard software like MSI Afterburner to monitor temperatures and stability while overclocking safely.
- A conservative overclocking profile (core clock +50–100 MHz, memory clock +300–500 MHz, power limit +5–10%) balances performance gains with minimal thermal cost and hardware longevity risk.
- Thorough stress testing using synthetic benchmarks and real-world gaming for at least 1 hour is essential to identify stable overclocking settings before relying on them daily.
- Overclocking voids manufacturer warranties and can degrade GPU lifespan; avoid voltage tweaks and keep sustained temperatures below 80°C to minimize silicon degradation.
What Is GPU Overclocking and Why Should You Care?
GPU overclocking is the practice of increasing the clock speeds of your graphics card beyond the manufacturer’s default settings. Think of it like tuning an engine, by running the GPU’s core and memory clocks faster, you’re pushing more operations through per second, which translates directly into better performance metrics like frame rates and benchmark scores.
Your GPU has two primary clock domains worth focusing on: the core clock (measured in MHz) and the memory clock. Most factory settings include a conservative buffer for stability across all silicon variations, meaning your specific card likely has headroom for speed increases. A typical overclock might net you 5–15% better frame rates, depending on your hardware and the game in question. In 1440p gaming, that could mean jumping from 100 FPS to 115 FPS, a difference you’ll definitely notice in fast-paced shooters where frame timing matters.
The real appeal for gamers is simple economics. A used $400 graphics card overclocked properly can perform closer to a $500 stock card, giving you years of extra gaming life without dropping another chunk of cash. For competitive players in titles like Valorant, CS:GO, or Apex Legends, that extra 20–30 FPS can reduce latency and improve visibility during high-stress moments. Even if you’re not hunting for esports-level performance, overclocking is a skill that separates informed hardware enthusiasts from those who accept whatever performance their cards deliver out of the box.
Essential Hardware and Tools You’ll Need Before Starting
Before you touch a single slider, you need the right gear in place. Overclocking places extra stress on your GPU, which means heat generation increases significantly. Voltage tweaks also demand careful monitoring to avoid permanent damage. Here’s what you actually need.
Cooling Solutions: Your First Priority
A quality cooler is non-negotiable. Stock coolers are designed for reference clock speeds, not overclocked workloads. After-market air coolers with dual or triple fans keep thermals in check during sustained gaming sessions. Brands like NOCTUA, be quiet., and Arctic offer excellent options for around $30–60. Liquid cooling, either AIO (all-in-one) or custom loop, gives you better thermal headroom if you’re planning aggressive overclocks, though it’s overkill for moderate tweaks.
Aim to keep your GPU under 80°C during gaming and under 85°C during stress tests. Anything above 90°C risks throttling performance or permanent damage. If your current cooler struggles to keep stock clocks below 75°C in summer, upgrade before overclocking.
Software Tools for Safe Overclocking
You’ll need three categories of software:
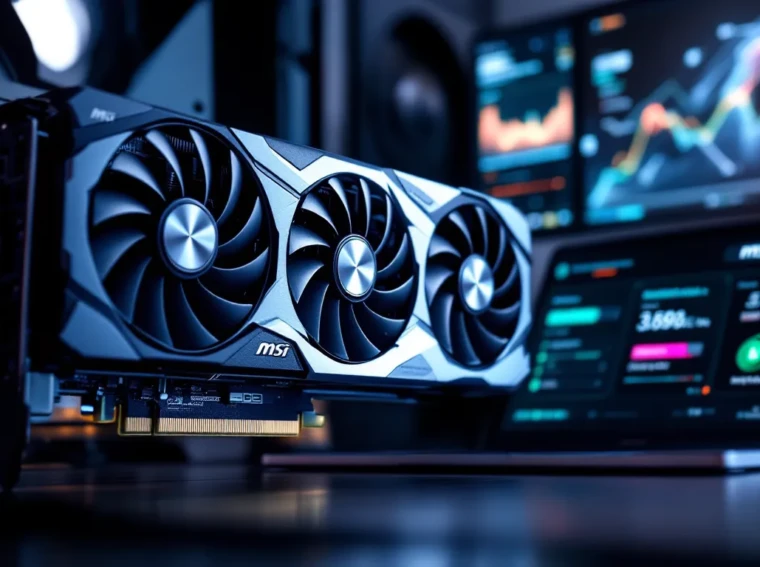
Overclocking utilities: MSI Afterburner is the industry standard, it works on NVIDIA and AMD cards and gives you intuitive sliders for core clock, memory clock, power limit, and temperature target. Sapphire Trixx and EVGA Precision X1 are solid alternatives if you prefer different interfaces.
Monitoring software: GPU-Z provides real-time readouts of clock speeds, temperatures, power draw, and memory usage. Overlay tools like MSI Afterburner’s built-in OSD or FrameView benchmarking software let you track performance metrics while gaming.
Stress testing: 3DMark (Time Spy, Port Royal), MemTest86, and FurMark are industry-standard tools. Games like Cyberpunk 2077 and 4A Games’ EngineOwl also make excellent real-world stress tests because they push GPUs harder than older titles.
Pre-Overclocking Preparation and Safety Checks
Jumping straight into aggressive clock increases is how you end up with a bricked graphics card. Spend an hour documenting your baseline performance and thermal behavior under load. This groundwork prevents expensive mistakes.
Understanding Your GPU’s Baseline Performance
Fire up GPU-Z and note your card’s stock core clock (listed as “GPU Clock”), memory clock (“Memory”), and power limit. Run a 10-minute benchmark like 3DMark Time Spy and record your GPU score. This becomes your baseline for measuring gains later.
Check the manufacturer specifications too. An RTX 4070 Ti has a boost clock around 2.5 GHz, while an RX 7900 XTX peaks around 2.5 GHz as well, but binning variations mean individual chips clock differently. Some chips (“golden samples”) overclock better than others due to silicon lottery. Your specific card might hit 2.7 GHz stable while another identical model tops out at 2.6 GHz.
Reading community results on forums like r/overclocking or hardware review sites like Tom’s Hardware GPU benchmarks gives you realistic expectations for your model. Don’t expect miracles, most quality GPUs gain 10–20% max performance with moderate overclocking.
Monitoring Temperature and Power Consumption
Before pushing clocks, understand your power delivery system. Flip your PSU switch off completely, then look at your card’s power connectors. Most modern cards use 8-pin or 6+2-pin PCIe power. A weak PSU becomes a bottleneck when your GPU demands extra watts during overclocks.
Monitor real-time power draw with GPU-Z during your baseline stress test. An RTX 4070 Ti might pull 350W stock but could demand 400W+ when overclocked. If your PSU is only rated 100W above your total system power draw, aggressive overclocking risks instability from voltage sag.
Temperature monitoring is equally critical. Run your baseline stress test and let the GPU settle into a thermal equilibrium after 2–3 minutes. This peak sustained temperature is your ceiling, you shouldn’t exceed it during overclocks without better cooling. Modern cards thermal-throttle around 83–86°C depending on the model, losing performance as clocks automatically dial back.
Step-By-Step GPU Overclocking Process
Now for the practical execution. This is where patience beats aggression. Micro-step adjustments reveal stability thresholds without crashing your system constantly.
Increasing Core Clock Speed Gradually
Open MSI Afterburner and locate the Core Clock slider. Start with a +25 MHz increase. Run a 5-minute benchmark. If that’s stable, bump it to +50 MHz. Most cards tolerate +50–150 MHz before hitting a stability wall, but some elite chips push past +250 MHz.
The key is finding your card’s specific ceiling. Increase in +25 MHz increments until your game or benchmark crashes or artifacts appear (graphical glitches, flickering). When that happens, back off by 50 MHz, that’s your stable core clock offset.
Example: You add +150 MHz and Cyberpunk 2077 crashes after 3 minutes. Dial it back to +100 MHz and stress test for 15 minutes. If it holds, you’ve found a stable offset. Lock that in.
Boosting Memory Clock for Additional Performance
Memory overclocking adds another 3–7% performance on top of core clock gains. The Memory Clock slider typically allows larger jumps, +500 MHz is common on modern GDDR6X cards. Start with +100 MHz and scale up in +50 MHz steps.
Memory instability manifests as visual artifacts or silent performance degrades where benchmark scores drop unexpectedly even though higher clocks. If you see the latter, you’ve pushed memory too far. Back off until scores improve consistently.
One quirk: memory overclocking is more temperature-sensitive than core clock. If your memory hit 95°C at +600 MHz, dropping to +500 MHz might lower VRAM temps 5 degrees and stabilize the system. Check Hardware Times GPU reviews for your card’s memory specifications if you’re targeting aggressive numbers.
Adjusting Power and Voltage Settings
The Power Limit slider (% increase) lets your GPU request more watts. At stock, this is often set to 100%. Increasing to 110–115% frees up thermal and electrical headroom. Beyond 120% offers diminishing returns and risks power delivery instability.
Voltage adjustment requires caution. Some cards allow direct Voltage control in Afterburner: others don’t. If your card supports it, modest increases (+25–50 mV) can stabilize higher clocks. But, beyond +75 mV you’re entering degradation territory where your GPU’s lifespan shortens measurably. Conservative overclocking avoids voltage tweaks entirely, sticking to core/memory clock adjustments alone.
A typical safe overclocking profile looks like this: Core +100 MHz, Memory +500 MHz, Power Limit +10%, no voltage changes. This nets roughly 8–12% performance gains with minimal thermal increase.
Testing Stability and Avoiding Common Pitfalls
Your overclock might feel stable during a 2-minute benchmark but crash after 30 minutes of gaming. Thorough stress testing separates a working overclock from one that’ll haunt you with random crashes.
Benchmarking Tools and Stress Testing Methods
Start with synthetic tests: 3DMark Time Spy (20 minutes), MemTest86 (1+ hour), or FurMark (30 minutes). These are predictable, repeatable, and isolate GPU stress. If your overclock crashes during a synthetic test, it’s unstable, no question.
After synthetic tests pass, run a real-world stress test: launch a demanding game at maximum settings and play for at least 1 hour without interruption. Cyberpunk 2077 at 1440p Ultra, Red Dead Redemption 2 maxed out, or Starfield with ultra settings are industry favorites. If you complete 90 minutes of gameplay without crashes, artifacts, or stuttering, you’ve likely found a stable overclock.
Check your temperatures at multiple stages. Peak temps during FurMark (worst-case synthetic load) should stay below 85°C. Peak temps during gaming should stay below 80°C. If either exceeds safe thresholds, dial back core/memory clocks or increase cooling.
Recognizing and Recovering From Crashes or Instability
Common instability signs include:
- Immediate crashes (within 5 seconds of launching a benchmark) suggest too aggressive core clock increases. Back off 50 MHz.
- Crashes after 2–5 minutes often point to memory instability or insufficient power delivery. Reduce memory offset by 100 MHz or increase power limit.
- Visual artifacts (colored pixels, flickering textures) during gameplay mean your card is pushing beyond its safe operating window. This is recoverable, dial back clocks 25 MHz, but it signals you’re at the boundary.
- Throttling (clocks suddenly dropping mid-game, causing FPS to plummet) happens when temps hit thermal limits. You need better cooling, not higher clocks.
If your PC crashes hard during an overclock, don’t panic. Shut down immediately and boot into safe mode. Reset Afterburner to defaults or uninstall and reinstall it. Your GPU hardware isn’t damaged by a software crash, only by sustained overheating or excessive voltage. Once you’ve reverted, reapply your overclock at more conservative settings.
Always save multiple overclocking profiles in Afterburner. Keep one labeled “Conservative” (-50 MHz core, +300 MHz memory, +5% power) for stability-first gaming and one labeled “Aggressive” (+150 MHz core, +600 MHz memory, +15% power) for benchmarking or less demanding titles.
Performance Gains and Real-World Gaming Impact
Numbers mean nothing without context. Let’s break down what realistic overclocking actually delivers in the games you play.
Expected Frame Rate Improvements Across Titles
Frame rate gains correlate directly with the power budget. A +100 MHz core clock increase paired with +500 MHz memory typically nets 8–12% FPS improvement. On an RTX 4070 Ti pulling 100 FPS in Cyberpunk 2077 at 1440p ultra, you’re looking at roughly 108–112 FPS post-overclock. In lighter esports titles like Valorant (already 200+ FPS), the absolute gain is smaller, maybe 15–20 FPS, but the percentage remains similar.
Memory-intensive workloads show larger memory overclocking benefits. Games with heavy streaming demands like Red Dead Redemption 2 or Alan Wake 2 see bigger gains from memory tweaks (+4–7%) than compute-heavy titles like Cyberpunk 2077 (+2–4%). This is why custom profiles per game matter. Your aggressive overclock that crushes in Starfield might crash MemTest without adjustments.
Here’s realistic data from mid-range cards:
- RTX 4060 Ti (stock 2.4 GHz): +12 FPS in 1440p gaming (roughly 10% improvement)
- RTX 4070 (stock 2.5 GHz): +18 FPS in 1440p gaming (roughly 11% improvement)
- RX 7800 XT (stock 2.4 GHz): +20 FPS in 1440p gaming (roughly 12% improvement)
High-end cards sometimes show smaller percentage gains because they’re already optimized from the factory, but absolute FPS jumps are larger, 35+ FPS on a 4090 isn’t uncommon.
Thermal and Power Trade-Offs to Consider
That 12% FPS gain comes at a cost. Your GPU’s power draw typically increases 15–25% when overclocked. An RTX 4070 pulling 300W stock might demand 360W when overclocked. Your PSU doesn’t care about efficiency, it has to deliver those watts. If your 850W PSU is already powering a system pulling 700W at stock, a +60W GPU load means you’re cutting margins dangerously thin.
Thermals scale non-linearly. A +100 MHz core clock increase raises temps by 5–8°C depending on cooling quality. In a room with poor airflow (summer, poorly ventilated case), that same overclock might add 12–15°C. Monitor seasonal changes, your “stable” winter overclock might throttle come July.
Longevity degradation accelerates with voltage increases. Running your GPU at +50 mV continuously will knock 1–2 years off its lifespan. Running it stock or with core-only overclocks? You’re looking at 5–7 years of reliable performance. This is why pro overclockers use ln2 (liquid nitrogen) for competition, it lets them push voltage crazy-high knowing the card will be used once then parted out.
For daily gaming, the sweet spot is core clock +50–100 MHz, memory clock +300–500 MHz, and power limit +5–10%, with zero voltage adjustments. You’ll gain 8–12% performance at minimal thermal and power cost, keeping your hardware reliable for years.
Protecting Your GPU: Longevity and Warranty Considerations
Overclocking voids warranties on most graphics cards. NVIDIA and AMD explicitly state that any clock modifications invalidate support and replacement guarantees. Some manufacturers like EVGA historically overlooked overclocking failures, but that goodwill isn’t guaranteed across the board.
If your card fails under warranty for any reason, fan bearing fails, VRAM degrades, and they detect an overclock (via thermal history logs or physical inspection), you’re buying a replacement. This is worth factoring into your cost-benefit analysis. A $50 performance gain means nothing if it costs you a $500 replacement when the card fails in year three.
To minimize risk, adopt these practices:
Document your baseline. Screenshot your stock GPU-Z values before any tweaks. If you ever need to RMA, you can prove the card worked at factory settings and the failure is unrelated.
Use conservative overclocks. Silicon degradation accelerates exponentially with voltage. A +0 mV core-only overclock ages your GPU maybe 5–10% faster than stock. A +100 mV voltage tweak ages it 50–100% faster. Stick to core and memory adjustments.
Monitor degradation over time. Every 6 months, re-baseline your overclock. If you need +150 MHz to hit the same score you hit with +100 MHz last year, silicon degradation is occurring. Scale back the overclock to slow aging.
Keep thermals in check. High sustained temperatures (80°C+) cause accelerated degradation. Even without overclocking, a card running hot every day will fail sooner. Overclocking multiplies this effect. Invest in better case airflow, cleaning, or replacement coolers to keep temps low.
Consider your hardware lifespan timeline. If you upgrade every 2 years, aggressive overclocking is low-risk, your card will be outdated before degradation matters. If you keep hardware 5+ years, conservative overclocking extends its useful life significantly.
One last consideration: some games and software actively penalize overclocked systems. Certain anti-cheat engines (notably in competitive esports titles) flag modified clock speeds and throttle performance or disconnect players. Before overclocking, check community forums for your favorite games, some esports titles explicitly don’t allow it.
Conclusion
Learning how to overclock your GPU is a skill that rewards patience and precision. The best overclocks aren’t achieved through aggressive slider pushing, they come from methodical testing, careful thermal management, and respect for your hardware’s limits. A conservative overclock that runs stable for years beats an aggressive one that crashes or degrades your silicon in months.
Start with modest adjustments: core clock +50 MHz, memory clock +300 MHz, power limit +5%. Stress test thoroughly. Once you’ve found your stable baseline, push incrementally, another +25 MHz here, +100 MHz there, until you hit a wall. Back off slightly, lock it in, and enjoy your 8–12% performance boost with minimal risk.
GPU overclocking won’t replace a GPU upgrade when you genuinely need one, but it extends the viable lifespan of your hardware and teaches you how your graphics card actually works. For gamers running high-refresh gaming or pushing visual fidelity, that knowledge translates into better frame rates and smoother gameplay without spending $400+ on a new card.