Look, steaming clams isn’t some esoteric culinary skill, it’s actually one of the most straightforward cooking methods out there, and it delivers restaurant-quality results in under 15 minutes. Whether you’re hosting a dinner, prepping a quick weeknight meal, or just want to understand how long to steam clams properly, this guide breaks down everything you need to know. The beauty of steaming is that it locks in flavor, keeps the meat tender, and there’s minimal cleanup involved. You won’t need fancy equipment or complicated techniques, just the right approach and a little attention to detail.
Key Takeaways
- Steaming clams is a straightforward cooking method that delivers restaurant-quality results in 5 to 10 minutes while preserving tender meat and natural brininess.
- Fresh littleneck or Manila clams with tightly closed shells are ideal for steaming; discard any clams that gape open or don’t respond to tapping before cooking.
- A basic pot with a lid, steamer basket, and brush are all the equipment you need to steam clams perfectly at home.
- Season your steaming broth with garlic, herbs, white wine, or butter to infuse the clams with flavor, and always set a timer to avoid overcooking.
- The most common mistakes when steaming clams are overcooking (making meat tough), not cleaning shells properly (leaving sand), and crowding the pot (preventing even cooking).
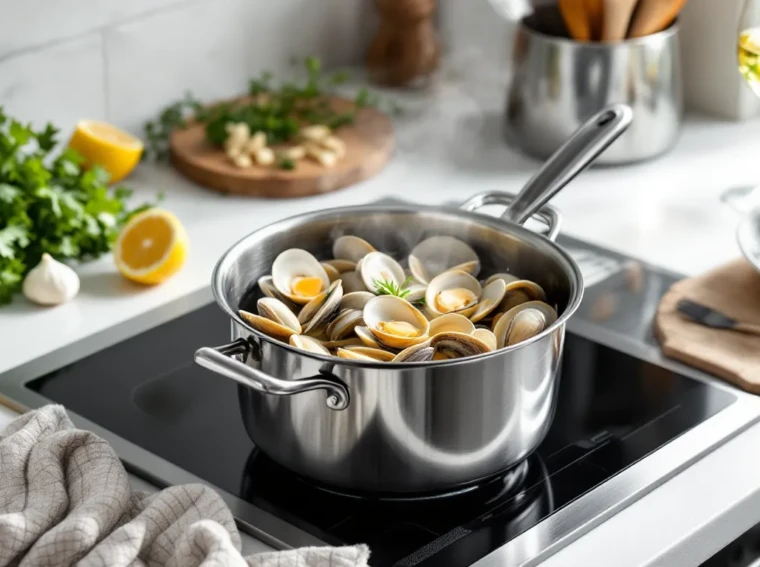
- Clams are done steaming when their shells pop open; littleneck clams typically take 5 to 7 minutes, while smaller varieties cook in 3 to 5 minutes from when the lid is placed.
Why Steaming Is the Best Method for Cooking Clams
Steaming clams is objectively superior to boiling or pan-frying when you want to preserve flavor and texture. Here’s why: steaming uses indirect heat and moisture to cook the clam meat gently, so it stays tender instead of becoming rubbery. When you boil clams, they can toughen up quickly if you’re not precise with timing. Pan-frying works, sure, but you lose a lot of the natural brininess and juices that make steamed clams shine.
The steam method also creates a built-in cooking liquid, basically a free, delicious broth that’s already seasoned from the clams’ own moisture and whatever aromatics you add. You get tender meat and a flavorful sauce ready to soak bread in or serve on the side. Plus, steaming is forgiving. The window between “perfectly cooked” and “overdone” is actually pretty wide compared to other methods, which means fewer ruined batches while you’re learning. Most clams steam through completely in 5 to 10 minutes, depending on size, faster than boiling and with better results.
Choosing the Right Clams for Steaming
Not all clams are created equal when it comes to steaming. You want clams that’ll cooperate with your heat source and deliver tender, flavorful meat. Let’s break down what to look for and which varieties work best.
Selecting Fresh Clams at the Market
Freshness is non-negotiable. Live clams have tightly closed shells, or they close immediately when you tap them. If a clam sits there gaping open and doesn’t respond to a gentle tap, it’s dead and should go straight into the trash. Dead clams harbor bacteria and will ruin the entire batch, so don’t take shortcuts here.
When you pick them up, they should feel heavy for their size, meaning they’re full of liquid. A light, hollow clam is a dud. Smell them too, fresh clams smell clean and briny, like the ocean. Anything fishy or off is a red flag. Buy clams the day you plan to cook them if possible, or store them in a cold spot (around 35–40°F) in a breathable bag in your fridge. Never store them in a sealed plastic bag because they need airflow. They’ll stay good for 2 to 3 days, but sooner is always better.
Types of Clams Best Suited for Steaming
Little necks are your go-to choice for steaming. They’re palm-sized, cook evenly, and have a sweet, tender flavor. Because of their consistency, they’re the standard choice in most restaurants and home kitchens. Littlenecks steam in 5 to 7 minutes on average.
Neck clams (also called cherry stones) are slightly smaller than littlenecks and cook a bit faster, around 4 to 6 minutes. They’re great if you’re in a rush or prefer smaller individual servings. Manila clams are another excellent option, especially if you find them at a good price. They’re smaller, cook quickly (3 to 5 minutes), and have a delicate sweetness.
Butter clams and other regional varieties work fine too, though they’re harder to find outside their native areas. The key is consistency: stick with clams that are relatively uniform in size so they cook at the same rate. Avoid huge quahogs or ocean clams for steaming, they’re better suited for chowder or raw preparations. Soft-shell clams can work but they’re more delicate and tend to lose their shells more easily during steaming, which can be annoying.
Essential Tools and Equipment You’ll Need
The good news: you don’t need a lot. A basic steamer setup is genuinely minimal and probably includes things you already own.
You need a pot with a lid, any size works as long as it’s big enough to hold your clams in a single layer without crowding. A 4 to 6-quart pot is ideal for most batches. The lid is critical: it keeps the steam in and cooks the clams evenly.
A steamer basket or insert is helpful but not mandatory. It keeps clams elevated above the water so they don’t sit in boiling liquid. If you don’t have one, you can use a colander placed inside the pot, or even just put the clams directly on the bottom and pour the cooking liquid over them, they’ll steam just fine.
You’ll also want a brush to scrub the outside of the clam shells under cold running water before cooking. A stiff vegetable brush works perfectly. Some people use an old toothbrush, which is honestly fine for smaller batches.
A slotted spoon or spider strainer is useful for removing cooked clams from the pot without losing the broth. A regular spoon works, but you’ll lose more liquid.
Optional but nice to have: a wine glass or measuring cup for adding liquids to the pot, tongs for handling hot clams, and a small colander lined with cheesecloth for straining the broth if you want it perfectly clear (though most people skip this step). That’s legitimately all you need. No specialized equipment required.
Step-by-Step Instructions for Steaming Clams
Here’s the actual process, broken down into two phases: prep and steam. Follow these steps and you’ll get consistent results every time.
Preparing Your Clams Before Steaming
Start by placing your live clams in a colander and rinsing them under cold running water. Use a stiff brush to scrub the outside of each shell, removing sand, dirt, and any debris. Don’t skip this, sand trapped in shells will grit between your teeth later, and nobody wants that.
If your clams are particularly sandy (which is common with clams from certain areas), you can soak them in cold, salted water for 30 minutes to an hour before cooking. This helps them purge trapped sand. Use about 3 tablespoons of salt per gallon of water. If you go this route, rinse them again after soaking.
Once they’re clean, discard any that are open and don’t close when tapped. You can also remove any broken shells at this point, just gently pull them away from the meat.
The Steaming Process Explained
Pour about 1 to 2 cups of liquid into the bottom of your pot. Water works, but broth (seafood, chicken, or vegetable) is better. Wine, white wine especially, is even better. Some people use a mix: half water or broth, half wine. Add whatever aromatics you’re using: garlic slices, fresh herbs like parsley or thyme, maybe a squeeze of lemon. Keep it simple for now, you’ll get fancy with flavor later.
Bring the liquid to a boil over medium-high heat. Once it’s boiling, add your prepped clams. If you have a steamer basket, place it first and add clams to that. If not, just add them directly to the pot. Cover the pot with the lid.
Start your timer. This is where the question “how long to steam clams” gets its answer: Littleneck clams typically take 5 to 7 minutes from the moment the pot is covered. Smaller varieties like Manila or neck clams take 3 to 5 minutes. The clams are done when their shells pop open. That’s the signal. Open shells = cooked meat.
Here’s the critical part: don’t ignore the pot just because the lid is on. Set a timer on your phone or kitchen timer so you don’t overcook. Overcooked clams shrink up and get tough. You want to catch them the moment they’ve all opened.
When the first clams start to pop open, that’s your 3-minute warning. Peak closely. Once all clams (or almost all) have opened, remove the pot from heat. Discard any that stubbornly refuse to open after the cooking time is up, those might be dead or damaged.
Use a slotted spoon to transfer cooked clams to a serving bowl. Strain the cooking broth through a fine mesh strainer into a separate bowl to remove sand or debris, then pour it over the clams or serve it on the side for dipping.
Flavor Combinations and Seasoning Ideas
Plain steamed clams are great, but a little seasoning turns them into something special. The beauty of steaming is that your broth becomes the delivery system for flavors, and the clams absorb everything.
Classic Broth and Sauce Recipes
The simplest approach: use chicken or seafood broth as your base liquid with fresh garlic (4 to 6 cloves, sliced), fresh parsley, and a pinch of salt. No wine needed. Cook the clams, serve them with the broth poured over, and finish with a squeeze of fresh lemon juice. That’s a perfect weeknight meal.
For something with more depth, add 2 tablespoons of butter to the hot broth after the clams are done cooking. The butter enriches everything and gives the broth a silky mouthfeel. Toss in some fresh chopped parsley right before serving.
Garlic butter clams are iconic for a reason. Make the basic garlic broth, then whisk in 3 to 4 tablespoons of softened butter along with minced fresh garlic and parsley. The emulsified butter coats the clams and makes them absolutely delicious. Serve with crusty bread for soaking up every drop.
Wine-Based and Herb-Infused Variations
White wine is a game-changer. Use 1 cup of dry white wine (sauvignon blanc or pinot grigio work great) mixed with 1 cup of water or broth. Add sliced garlic, fresh thyme, bay leaf, and a pinch of red pepper flakes for subtle heat. The wine adds acidity and complexity that clams love.
If you want to get fancier, try a saffron broth: use white wine and broth as your base, add a pinch of saffron threads (steep them in the warm liquid for a few minutes before cooking), fresh fennel slices, and a touch of anise flavor. It sounds weird, but saffron and clams are a traditional pairing in Mediterranean cooking for good reason.
Herb-infused versions let you flex creativity. Fresh basil, oregano, or tarragon all work beautifully. Add them to the broth at the start and they’ll infuse the clams as they cook. A sprig of rosemary adds earthiness. Lemongrass and ginger create an Asian-inspired broth that’s fantastic over rice.
Red pepper flakes deserve their own mention. A pinch adds heat without overwhelming the delicate clam flavor. Start with a quarter teaspoon and adjust from there. Some people add a splash of hot sauce, sriracha or Frank’s RedHot, to the finished broth for a completely different vibe.
Common Mistakes to Avoid When Steaming Clams
Most clam disasters come from a handful of avoidable errors. Knowing what goes wrong helps you sidestep them.
Overcooking is the biggest killer. Clams cook fast, and the window between perfect and rubbery is narrow. A minute or two too long and you’ve got tough, shrunken meat. Set a timer. Check at the 4-minute mark if you’re using littlenecks. Don’t assume “10 minutes should be safe”, that’s how you end up with mush.
Not cleaning the clams properly leads to sandy, gritty results. Every grain of sand that ends up in your pot ends up in your mouth. Brush them thoroughly. If sand is a persistent issue, soak them in salted water beforehand. It’s an extra 30 minutes, but it’s worth it.
Cooking clams that are already dead is genuinely dangerous. Dead clams harbor bacteria that can cause food poisoning. Discard anything that doesn’t close when tapped, and anything that refuses to open after cooking. This is non-negotiable.
Crowding the pot is less of a disaster, more of a headache. If clams are piled on top of each other, the ones on top won’t steam evenly. They might open while the bottom ones are still closed. Either work in batches or use a larger pot. A single layer is ideal.
Using not enough liquid is a quick way to burn your pot and ruin the broth. You need enough liquid to generate steam without boiling away completely. 1.5 to 2 cups is the sweet spot for most pots. If you’re cooking a huge batch, scale up the liquid proportionally.
Ignoring the clams while they cook and walking away sounds convenient, but clams cook fast. If you’re not paying attention, you’ll miss the window and overcook them. Stay nearby. Set a timer and check at the lower end of the estimated time.
Not seasoning the broth is a missed opportunity. Even if you’re going ultra-simple, add salt and maybe garlic. The cooking liquid carries flavor directly to the clams. A bland broth means bland clams.
Troubleshooting Tips for Perfect Results Every Time
Even with a solid plan, things sometimes go sideways. Here’s how to handle common hiccups.
If your clams aren’t opening after 8 to 10 minutes, something’s wrong. Either the heat is too low (crank it up), you’re not generating enough steam (check that the lid fits snugly), or the clams are dead or damaged. Pull the pot off the heat, remove any open clams, and discard the rest. Don’t force it.
If one or two clams refuse to open while the rest are done, remove the opened clams and let the stubborn ones cook for another minute or two. Sometimes the bigger ones need a little extra time. If they still won’t open after that, toss them.
Gritty clams mean you didn’t clean thoroughly enough or sand slipped through. For next time, soak them first and brush harder. If it happens this time, strain the broth through a fine mesh or cheesecloth before serving and warn your guests. It happens.
If the broth tastes bland, you can always add more seasoning at the end. A splash of white wine, a pinch of salt, fresh lemon juice, or a knob of butter can rescue weak broth. Taste before serving and adjust.
If the clams taste fishy or off, they might have been stored improperly or started out bad. Trust your instincts. Clams should taste fresh and briny, like the ocean. If something seems wrong, it probably is.
Small clams that open too fast (Manila clams especially) can be a little easy to overcook. Watch them carefully. They might be ready at 3 or 4 minutes instead of the 5 to 7 you’d use for littlenecks. Size matters, so adjust your timing accordingly. Organizations like Shacknews publish detailed cooking guides if you want reference material, and gaming sites often include recipe content in their lifestyle sections. Sites like How-To Geek also cover kitchen techniques in depth, which can help you refine your approach.
If you consistently have timing issues, invest in an instant-read meat thermometer. Clam meat should reach 160°F internally when done. It’s a sanity check that takes the guesswork out of the equation, though experienced cooks usually just watch for the shells to pop open.
Conclusion
Steaming clams is genuinely one of the easiest ways to cook fresh seafood at home, and the results are reliably delicious. You now know how long to steam clams (5 to 7 minutes for littlenecks, 3 to 5 for smaller varieties), how to pick the right clams, what equipment actually matters, and how to flavor them to perfection. The formula is straightforward: clean clams, bring liquid to a boil, cook clams until they open, serve with broth. Stick to that and you’ll nail it every time. The beauty is that once you’re comfortable with the basic technique, you can experiment endlessly with broths, wines, herbs, and seasonings. Start simple, master the fundamentals, then get creative. Your dinner guests will be impressed, and you’ll have a reliable method you can execute with confidence.