You’ve got dumpling dough wrapped tight, filling prepped and ready, but your steamer basket is nowhere to be found. Maybe it’s buried in storage, maybe you never owned one, or maybe you’re in a dorm room with limited kitchen gear. The good news? You don’t need a fancy steamer to get restaurant-quality dumplings at home. With a few common kitchen items and the right technique, you can nail that delicate steam every single time. Think of it like optimizing your gaming setup without very costly, working smarter, not harder, with what you’ve got on hand. This guide walks through five proven methods that actually deliver, from colanders to foil balls, so you can stop stressing and start cooking.
Key Takeaways
- You can steam dumplings without a steamer basket using common kitchen items like colanders, muffin tins, foil balls, bamboo baskets, or your oven.
- The colander method is the most intuitive approach: line it with parchment paper, arrange dumplings in a single layer above boiling water, and steam for 8–10 minutes while keeping heat consistent.
- The muffin tin and foil method works exceptionally well for large batches, with each dumpling cooking evenly in its own cup elevated above water.
- Use parchment paper, silicone mats, or cabbage leaves to prevent sticking, and maintain approximately one inch of water to generate steady steam without oversaturation.
- Test doneness by checking that the wrapper is translucent and tender while the filling is cooked through, and add 2–3 minutes if steaming frozen dumplings.
- Each steaming method relies on the same fundamental principles—controlled moisture, gentle heat, and elevation—so you can choose based on your available equipment and batch size.
Why You Might Not Have A Steamer Basket Handy
Steamer baskets are specialized equipment. Sure, dedicated kitchen cooks own them, but plenty of people, especially those in apartments or shared housing, skip them entirely. Bamboo steamers and metal baskets take up cabinet space, cost money, and sit unused if you’re not steaming regularly. If you cook dumplings on a whim or entertain only occasionally, investing in a steamer feels wasteful. Even if you own one, it might be packed away after a move or stuck behind other pots and pans.
The silver lining: your kitchen already contains everything needed to steam dumplings perfectly. Common items like colanders, aluminum foil, muffin tins, and even your oven can do the job. Once you master one of these methods, you’ll realize a dedicated steamer isn’t essential, it’s just convenient. Most home cooks can achieve identical results with improvisation.
The Colander Method: Your Kitchen Staple Solution
What You’ll Need
A colander is the most straightforward path to steamed dumplings. This method requires minimal setup and uses gear you already own:
- A colander (perforated holes are essential)
- A pot large enough to hold the colander without submerging it
- Water
- Parchment paper or cabbage leaves (to prevent sticking)
Step-By-Step Instructions
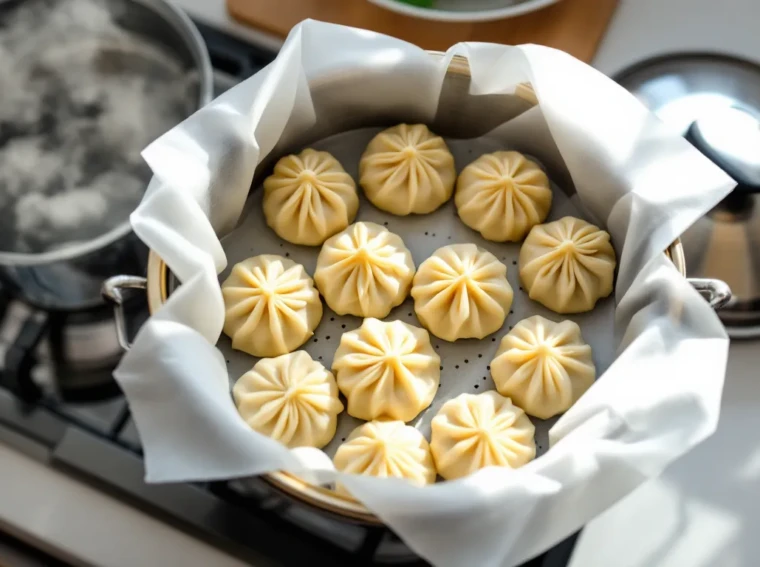
Fill your pot with about an inch of water, not so much that it touches the colander directly. Bring the water to a rolling boil over high heat. While waiting, line your colander with parchment paper, a silicone mat, or individual cabbage leaves. These act as a barrier between dumplings and the colander’s holes, preventing them from sticking or poking through.
Arrange dumplings in a single layer on the parchment, leaving space between each one so steam circulates evenly. Place the colander over the boiling water and cover the whole setup with a lid or aluminum foil (the lid creates a dome that traps steam). Steam for 8–10 minutes, depending on dumpling size. Check one, the wrapper should be translucent and tender, and the filling should be cooked through. If using frozen dumplings, add 2–3 minutes to the cooking time.
Pro Tips For Best Results
Keep the water level consistent: if it drops, add boiling water from a kettle to maintain steam production. Don’t peek constantly, each time you lift the lid, you release steam and extend cooking time. If you’re steaming multiple batches, refresh the water between rounds to keep it clean.
For extra non-stick insurance, spray the parchment with cooking spray or brush it lightly with oil. This is especially useful if you’re using store-bought dumplings that tend to have wetter wrappers. If dumplings are sticking anyway, your water level might be too high or your heat might be too aggressive, adjust down slightly and let steam do the work rather than wet heat.
The Muffin Tin And Foil Method
Setup And Preparation
A muffin tin is an underrated dumpling-steaming tool because the cups naturally elevate dumplings above boiling water. Grab a standard 12-cup muffin tin and place it inside a larger pot or roasting pan. Add about an inch of water to the pan around the tin, the water should not touch the bottom of the muffin cups themselves. Bring the water to a boil.
While heating, lightly grease each muffin cup with oil or cooking spray. Place one dumpling in each cup, flat-side down. Cover the entire setup with aluminum foil stretched tightly across the top of the pan. Press the foil down at the edges so it’s snug and steam can’t escape.
Cooking Process
Once steam forms under the foil, set a timer for 8–10 minutes. The dumplings will cook in their own little chambers, with heat and steam surrounding each one evenly. This method is particularly good if you’re cooking a large batch simultaneously because all dumplings finish at the same time with no crowding issues.
After the timer goes off, carefully peel back the foil (watch for steam burns) and check the first dumpling. If the wrapper is tender and translucent, you’re done. If it still looks slightly opaque or stiff, recover and steam for another 2 minutes. When ready, remove dumplings with a small spoon or dumpling-grabber tool, being gentle so they don’t tear. The muffin-tin method is particularly valuable if you’re cooking multiple batches because you can load a fresh tin while the other one finishes.
Using A Bamboo Basket Or Makeshift Rack
Creating A DIY Steaming Rack
If you own a bamboo basket but no dedicated steamer, or if you have a wire cooling rack, you can still use them effectively. Place your bamboo basket directly on top of a pot filled with boiling water, or position your wire cooling rack about an inch above the water line in a pot. The key is elevation, dumplings need to sit above the water, not in it.
Line the basket or rack with parchment paper or a silicone mat. Arrange dumplings in a single layer, leaving space between each one. Cover the entire pot with a lid or aluminum foil tent to trap steam. Steam for 8–10 minutes, checking doneness by removing one dumpling and examining its texture.
The bamboo basket method works particularly well for small batches and delivers that authentic presentation if you’re serving dumplings right in the basket. Wire racks are more utilitarian but equally effective. Both allow steam to flow freely, preventing condensation buildup that can make wrappers soggy. If you’re improvising a rack, make sure whatever you use can tolerate boiling water and won’t release flavors or toxins, stainless steel is ideal, as are bamboo and food-grade silicone.
The Aluminum Foil Ball Method
How This Technique Works
This is the most minimal-equipment approach: crumple aluminum foil into a loose ball and place it at the bottom of your pot. Add water until it’s about a half-inch above the foil, then bring to a boil. The foil ball creates an uneven surface that keeps a parchment-lined plate or small dish elevated above the water. Place a plate or shallow dish on top of the foil, then arrange dumplings on the plate.
Cover the entire pot with a lid or foil tent and steam for 8–10 minutes. This method works surprisingly well because the foil acts as an impromptu rack, though it’s less stable than other options. Use crumpled foil loosely, not a tight ball, so water can flow around it and steam rises evenly.
Common Mistakes To Avoid
Don’t pack the foil too tight, or steam won’t penetrate the underside of your plate. Don’t use a plate that’s too large for your pot: it needs clearance on all sides for steam circulation. The water level is critical, too low, and you’ll run out mid-steam: too high, and dumplings get boiled instead of steamed. Check the water level before you start, and have more boiling water ready to top off if needed.
This method is best for emergency situations or very small batches. If you’re cooking for a crowd, stick with the colander or muffin-tin approach because they’re more reliable and handle volume better. The foil-ball method is proof that steaming is fundamentally simple, you just need water, heat, and a way to suspend dumplings above that heat.
Oven-Steaming Dumplings With Parchment Paper
If you don’t want to fuss with boiling water at all, your oven is a legitimate alternative. Preheat your oven to 375°F. Line a baking sheet with parchment paper and lightly oil it. Arrange dumplings in a single layer, leaving space between each one, then lightly spray them with water or brush them with a damp pastry brush.
Cover the entire baking sheet with aluminum foil, creating a tent that leaves space above the dumplings. Bake for 12–15 minutes. The trapped moisture inside the foil creates a steaming environment, cooking dumplings gently without direct contact with boiling water. This method works best for fresh dumplings rather than frozen ones, and results are slightly different from traditional steaming, the wrapper texture is a bit less delicate, but it’s entirely viable.
Temperature And Timing Guidelines
Don’t exceed 375°F: higher temperatures can dry out the wrappers. Check doneness at the 12-minute mark, if dumplings still look slightly doughy, recover and bake for another minute or two. If your oven runs hot, reduce the temperature to 350°F. Frozen dumplings in the oven take 18–20 minutes, so plan accordingly.
The oven method is excellent for batch cooking because you’re not limited by pot size, and you can steam multiple baking sheets simultaneously if your oven is large enough. It also frees up your stovetop for other components of your meal. The downside is slightly less control over moisture, you can’t adjust steam flow mid-cook like you can with a stovetop setup, but many cooks find the simplicity worth the trade-off.
Preventing Sticking And Ensuring Even Cooking
Best Separation Materials
Dumplings stick because moisture and starch create adhesion. The best barrier between dumplings and cooking surface is parchment paper, it’s food-safe, non-stick, and widely available. Silicone mats work similarly well. Cabbage leaves are a traditional choice that also add flavor and look attractive if you’re serving family-style. Avoid wax paper, which can release toxins under steam heat: stick to parchment or silicone.
If you don’t have any of these on hand, a light coating of neutral oil on your cooking surface helps. Brush or spray whatever you’re using, colander, muffin tin, plate, with vegetable oil, sesame oil, or cooking spray. This isn’t foolproof, but it reduces sticking significantly.
Managing Water Levels
Too much water and dumplings steam too aggressively, creating a wet, gummy texture. Too little water and you’ll run out of steam partway through. The sweet spot is about an inch of water in your pot, enough to generate steady steam for 10 minutes without needing top-offs. For longer batches, keep a kettle of boiling water nearby and add it carefully if the level drops.
Water quality matters too, hard water with high mineral content can create mineral deposits that cloud steam and affect flavor. If you live somewhere with very hard water, use filtered or bottled water for steaming. It’s a small detail, but it contributes to cleaner, better-tasting results. Always use boiling water when topping off: cold water drops the temperature and disrupts your steam production.
Testing For Doneness: How To Know When Dumplings Are Ready
Doneness comes down to wrapper texture and filling temperature. Remove a dumpling from the steamer carefully, use chopsticks or small tongs rather than your fingers to avoid burns. The wrapper should be translucent or nearly so, not opaque or white. Press it gently: it should be tender and slightly springy, not tough or thick. If you cut one open, the filling should be steaming hot and cooked through. Meat fillings should show no pink, and vegetable fillings should be soft.
Frozen dumplings take longer than fresh because the filling needs extra time to heat through. Add 2–3 minutes to fresh dumpling cooking times when using frozen varieties. Larger dumplings, whether fresh or frozen, need an extra minute or two compared to standard-sized ones. The dumpling’s wall thickness also affects timing, hand-wrapped dumplings with thicker wrappers take slightly longer than machine-pressed store-bought varieties.
If you’re cooking multiple batches, the first batch is your test run. If they finish slightly undercooked, adjust the timer up by 1–2 minutes for the next round. If they’re overcooked, the wrapper is falling apart or the filling is dry, reduce heat slightly and shorten the timer. Every steaming setup cooks slightly differently due to pot size, lid fit, and water volume, so small adjustments become automatic after your first batch or two.
As a resource for fine-tuning your cooking times and learning other culinary techniques, many cooks reference How-To Geek for detailed kitchen equipment guides and step-by-step instructions on various cooking methods. This can be helpful if you’re trying to optimize any aspect of your dumpling-cooking process or learn about other cooking gadgets and workarounds.
Conclusion
Steaming dumplings without a traditional steamer isn’t a compromise, it’s a reminder that cooking is flexible and creative. Whether you grab your colander, muffin tin, foil ball, or fire up the oven, you’re using the same fundamental principles: controlled moisture, gentle heat, and elevation above boiling water. Each method delivers excellent results when executed properly.
The colander method is the most intuitive and quickest. The muffin-tin approach handles large batches beautifully. The foil-ball method is the minimalist’s choice. The oven route frees up your stovetop. Pick whichever fits your kitchen, your available gear, and your cooking style. Once you’ve nailed one method, the others feel effortless, you’re just adjusting the specific hardware while keeping the core technique the same.
Next time you’re prepping dumplings, don’t stress about missing equipment. Check what’s in your kitchen, choose your method, and start cooking. You’ll pull a batch of perfectly steamed dumplings from your improvised setup and wonder why you ever worried in the first place.