Steaming green beans might seem straightforward, but there’s a real difference between mushy, flavorless beans and perfectly tender ones with that ideal snap. Whether you’re meal prepping for the week or throwing together a quick dinner side, nailing the steaming technique saves time and delivers better results than boiling. This guide breaks down everything from equipment to timing, so you can consistently make green beans that actually taste good, no kitchen experience required.
Key Takeaways
- Steaming green beans preserves nutrients and maintains a firm-tender texture better than boiling, while concentrating natural flavor and allowing for aromatic infusions.
- A metal steamer basket, microwave, or Instant Pot all work effectively for steaming; choose based on your kitchen setup and time constraints for consistent results.
- Fresh, bright green beans in medium size cook most evenly when arranged in a single layer without overcrowding, typically requiring 7–8 minutes on stovetop or 5–6 minutes in a microwave.
- Check doneness by piercing a bean at its thickest point with a fork—it should slide through easily with light pressure and retain a slight firmness when bitten.
- Simple butter and garlic or bold international flavors like sesame oil and soy sauce transform steamed green beans when applied immediately after cooking while beans are hot and most absorbent.
- Cooled steamed beans store for 3–4 days refrigerated or 6–8 months frozen, making them ideal for meal prep when stored plain in an airtight container.
Why Steaming Is the Best Cooking Method for Green Beans
Steaming preserves the nutrients that boiling leaches away. When you boil green beans, water-soluble vitamins like B vitamins and vitamin C escape into the cooking liquid. Steaming keeps those nutrients locked in the beans themselves.
The texture stays vibrant too. Steamed beans hold their firm-tender texture better than boiled ones, which can turn mushy if you’re not watching them constantly. You get that satisfying bite without the stringy, overcooked feel.
Flavor is another huge win. Steaming concentrates the natural taste of the beans instead of diluting it like boiling does. Plus, you can infuse the steam itself with aromatics, garlic, lemon, or herbs, for minimal extra effort. The result is bright, fresh-tasting green beans that actually make you want to eat your vegetables.
Essential Equipment You’ll Need
Steamer Baskets and Bamboo Steamers
A metal steamer basket is the workhorse of stovetop steaming. These collapsible models fit into most standard pots and cost under $15. The adjustable petals expand to grip the sides of your pot, holding beans above boiling water. Bamboo steamers are popular too, they’re attractive, distribute heat evenly, and work great for batches. Both are durable and last years with basic care.
If you’re doing serious batch cooking, a dedicated bamboo or stainless steel steamer pot (with multiple tiers) gives you more capacity and even heat distribution. These run $30–$50 and are worth it if you steam vegetables regularly.
Microwave and Instant Pot Options
Don’t have a stovetop steamer? A microwave works surprisingly well for quick batches. You just need a microwave-safe container with a loose lid (not airtight). Instant Pots and pressure cookers have built-in steaming functions, the trivet that comes with them does the job perfectly. These methods are faster too, which matters when you’re in a rush.
For beginners or anyone with minimal kitchen space, the microwave method is dead simple and gives solid results in under 10 minutes.
Selecting and Preparing Your Green Beans
Choosing Fresh, Quality Beans
Fresh green beans should be bright green, firm, and snap when you bend them. Avoid beans that are limp, yellowing, or have soft spots, those are past their prime. Check the produce section for the brightest batch: they’ll taste noticeably better than pale or brownish ones.
Size matters a bit too. Medium-sized beans cook more evenly than very thick or very thin ones. If you end up with a mix, you can group similar sizes together on your steamer tray so they cook at the same rate.
Cleaning and Trimming Techniques
Rinse beans under cold running water and rub them gently with your hands to remove any dirt. Pat dry with a clean towel, excess moisture can extend cooking time and create excess steam in your pot.
Trimming is quick: hold a bean at both ends and snap off the pointy tip at each end. Some people skip the tail end if it’s tiny, but removing the stem end where the bean connected to the plant is always worth doing. If you’re processing a lot, line them up on a cutting board and use a sharp knife to trim several at once. It’s faster than snapping individual beans and looks neater on the plate.
Step-by-Step Steaming Instructions
Traditional Stovetop Steaming
- Fill your pot with about 1–2 inches of water. The water shouldn’t touch the steamer basket when it’s in place.
- Insert the steamer basket and bring water to a rolling boil over medium-high heat. You should see consistent steam rising.
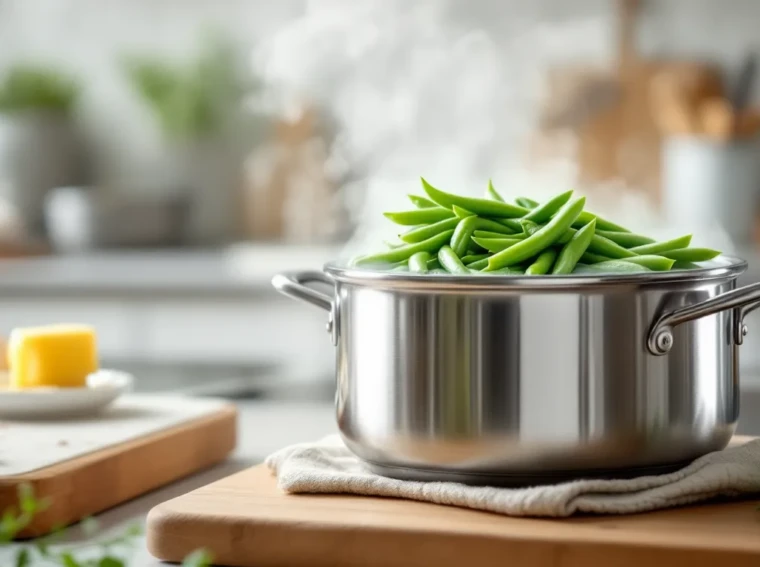
- Add trimmed beans to the basket in a single layer. They can overlap slightly, but overcrowding traps steam and causes uneven cooking.
- Cover the pot with a lid to contain the steam. If you don’t have a lid, aluminum foil works in a pinch.
- Check doneness starting at 5 minutes for thin beans, 7–8 minutes for medium ones. More on this below.
The whole process is hands-off once the water’s boiling. You’re not stirring anything or babysitting the heat, just waiting.
Microwave Steaming Method
- Place trimmed beans in a microwave-safe bowl or container with about 3–4 tablespoons of water. Don’t submerge them: the steam does the work.
- Cover loosely with a lid or plate (leave a tiny gap so steam can escape slightly, this prevents the container from pressurizing).
- Microwave at full power for 4–6 minutes, depending on the amount. A standard microwave and a small handful of beans takes about 4 minutes.
- Carefully remove the lid away from your face, the steam is hot.
- Drain if needed before serving.
This is the fastest method by far. Perfect for single servings or small side dishes.
Instant Pot and Pressure Cooker Steaming
- Add 1 cup of water to the Instant Pot and place the trivet (the metal rack) inside.
- Arrange beans on the trivet. They can pile loosely: pressure cooking handles uneven spacing better than stovetop methods.
- Close the lid and set the valve to “sealing.”
- Set to high pressure for 3 minutes using the manual or pressure cook button.
- Use quick release when the timer goes off, press the valve to vent steam manually.
- Drain if there’s excess liquid before serving.
Instant Pots cook faster because of the pressurized environment. The tradeoff is that you have less visual control over doneness, but 3 minutes at high pressure is reliable for medium-sized beans. If you prefer slightly crispier beans, reduce to 2 minutes.
Timing and Doneness: How to Know When Your Beans Are Ready
Doneness is personal, but the target is usually “tender-crisp”, soft enough to cut easily with a fork, but with a slight firmness when you bite into it. If a bean bends without any resistance, it’s overdone.
Use a fork or sharp knife to pierce a bean at the thickest part. It should slide through with light pressure, not crumble or snap loudly. If it feels waxy or hard inside, it needs more time. If it’s mushy, you’ve gone too far, note that for next time.
Timing guides (these are starting points: your actual time depends on bean size, water temperature, and altitude):
- Thin beans: 5–6 minutes on stovetop, 3–4 minutes in microwave
- Medium beans: 7–8 minutes on stovetop, 5–6 minutes in microwave
- Thick beans: 9–10 minutes on stovetop, 6–7 minutes in microwave
- Instant Pot: 3 minutes for medium beans, 2 minutes for thin ones
Start checking at the lower end of the range. You can always cook longer, but you can’t undo overcooking. Set a timer and check early if you’re new to steaming, this teaches you what “done” looks like in your kitchen.
Flavor Enhancements and Seasoning Ideas
Simple Butter and Garlic Combinations
The easiest upgrade: toss hot beans with butter and minced garlic. Use about 1 tablespoon of butter and 2–3 cloves of minced garlic per pound of beans. The residual heat will soften and fragrant the garlic without burning it.
Add a squeeze of fresh lemon juice for brightness. This is a classic French preparation and works with any bean size. If you want even more depth, stir in a tiny pinch of red pepper flakes for subtle heat, or a sprinkle of Parmesan for umami.
Almond slivers or toasted breadcrumbs add texture if you want crunch. Toss them in after buttering to keep them crisp.
Bold Spices and International Flavors
Asian-inspired: Finish beans with sesame oil, a pinch of ginger, soy sauce, and a drizzle of rice vinegar. Add sesame seeds on top.
Mediterranean: Toss with olive oil, fresh herbs like thyme or oregano, minced garlic, and a squeeze of lemon.
Indian-style: Warm cumin and coriander seeds in oil, then toss with the beans. Add a pinch of turmeric and finish with fresh cilantro.
Spanish: Use smoked paprika, crispy bacon bits, and a touch of garlic.
The key is adding these after steaming. Hot beans absorb seasoning flavors better than cold ones. Taste as you go, it’s easier to add more seasoning than to dial it back.
Common Mistakes to Avoid
Overcrowding the steamer. Too many beans stacked on top of each other blocks steam from reaching the bottom layer. Space them out in a single or loosely-piled layer. If you’re cooking a large batch, steam in two rounds, it only adds a few minutes total.
Using too much water. If water touches the beans or steamer basket, you’re boiling, not steaming. Keep water level 1–2 inches below the basket. If water boils away during cooking, the pot can scorch. Check the water level before you start and add a splash more if the pot is running low.
Peeking constantly. Every time you lift the lid, heat and steam escape, adding 2–3 minutes to cook time. Set a timer and trust it. You’ll get better at eyeballing doneness over time.
Cooking cold beans without patting them dry. Excess water on the beans extends cooking time slightly and makes them absorb flavoring less effectively. A quick pat with a towel makes a difference.
Overseasoning raw or immediately after steaming. Green beans are delicate, bold seasonings can overpower them. Start light and add more if needed. Fresh lemon and garlic usually work better than heavy spices for a first effort.
Another resource for perfecting cooking techniques is How-To Geek’s kitchen guides, which offers tested methods for various vegetables and cooking methods.
Storage and Reheating Tips
Refrigerator storage: Cooled steamed beans last 3–4 days in an airtight container. Store them plain (without sauce or heavy seasoning) so they don’t absorb flavors and become mushy. Pat them dry before storing to prevent excess moisture.
Freezing: Blanch steamed beans briefly in ice water to stop the cooking process, then freeze in a single layer on a baking sheet before transferring to freezer bags. Frozen beans keep for 6–8 months and thaw quickly for reheating.
Reheating stovetop: Place beans in a skillet with a splash of water or butter over medium heat for 2–3 minutes, stirring gently. This restores some texture without overcooking.
Microwave reheating: Place in a microwave-safe bowl with 1–2 tablespoons of water, cover loosely, and heat at 50% power for 2–3 minutes. This gentler approach keeps them from turning mushy.
Cold salads: Cooled steamed beans work great in salads with vinaigrette, red onion, and cherry tomatoes. They’re also good mixed with other roasted vegetables.
For inspiration on meal prep and vegetable-forward dishes, GameSpot’s lifestyle content and IGN’s features occasionally cover food and wellness topics alongside entertainment.
Proper storage makes it easy to prep ahead and have ready-to-eat vegetables throughout the week. Steamed beans are a reliable, nutritious go-to.
Conclusion
Steaming green beans is straightforward once you nail the basics: start with fresh beans, use the right equipment, don’t overcrowd, and check doneness early. You’ll have bright, nutritious vegetables with a tender-crisp texture that actually tastes like something worth eating.
The beauty of steaming is flexibility. Whether you’re using a stovetop steamer, microwave, or Instant Pot, the results are consistent and fast. From there, simple butter and garlic or bolder international spices transform steamed beans into something memorable on any plate.
Start with the method that fits your kitchen setup, stick with one until you know how long your beans take to cook, and adjust from there. After a few rounds, you’ll develop instincts for doneness and timing that take out any guesswork. Perfect steamed green beans aren’t a mystery, they’re just a few minutes away.